
 EUREuro
 GBPBritish Pound
 AUDAustralian Dollar
- WhatsApp:+86-19892834301
- Email: automantool@hotmail.com
- Skype:autoobdtop


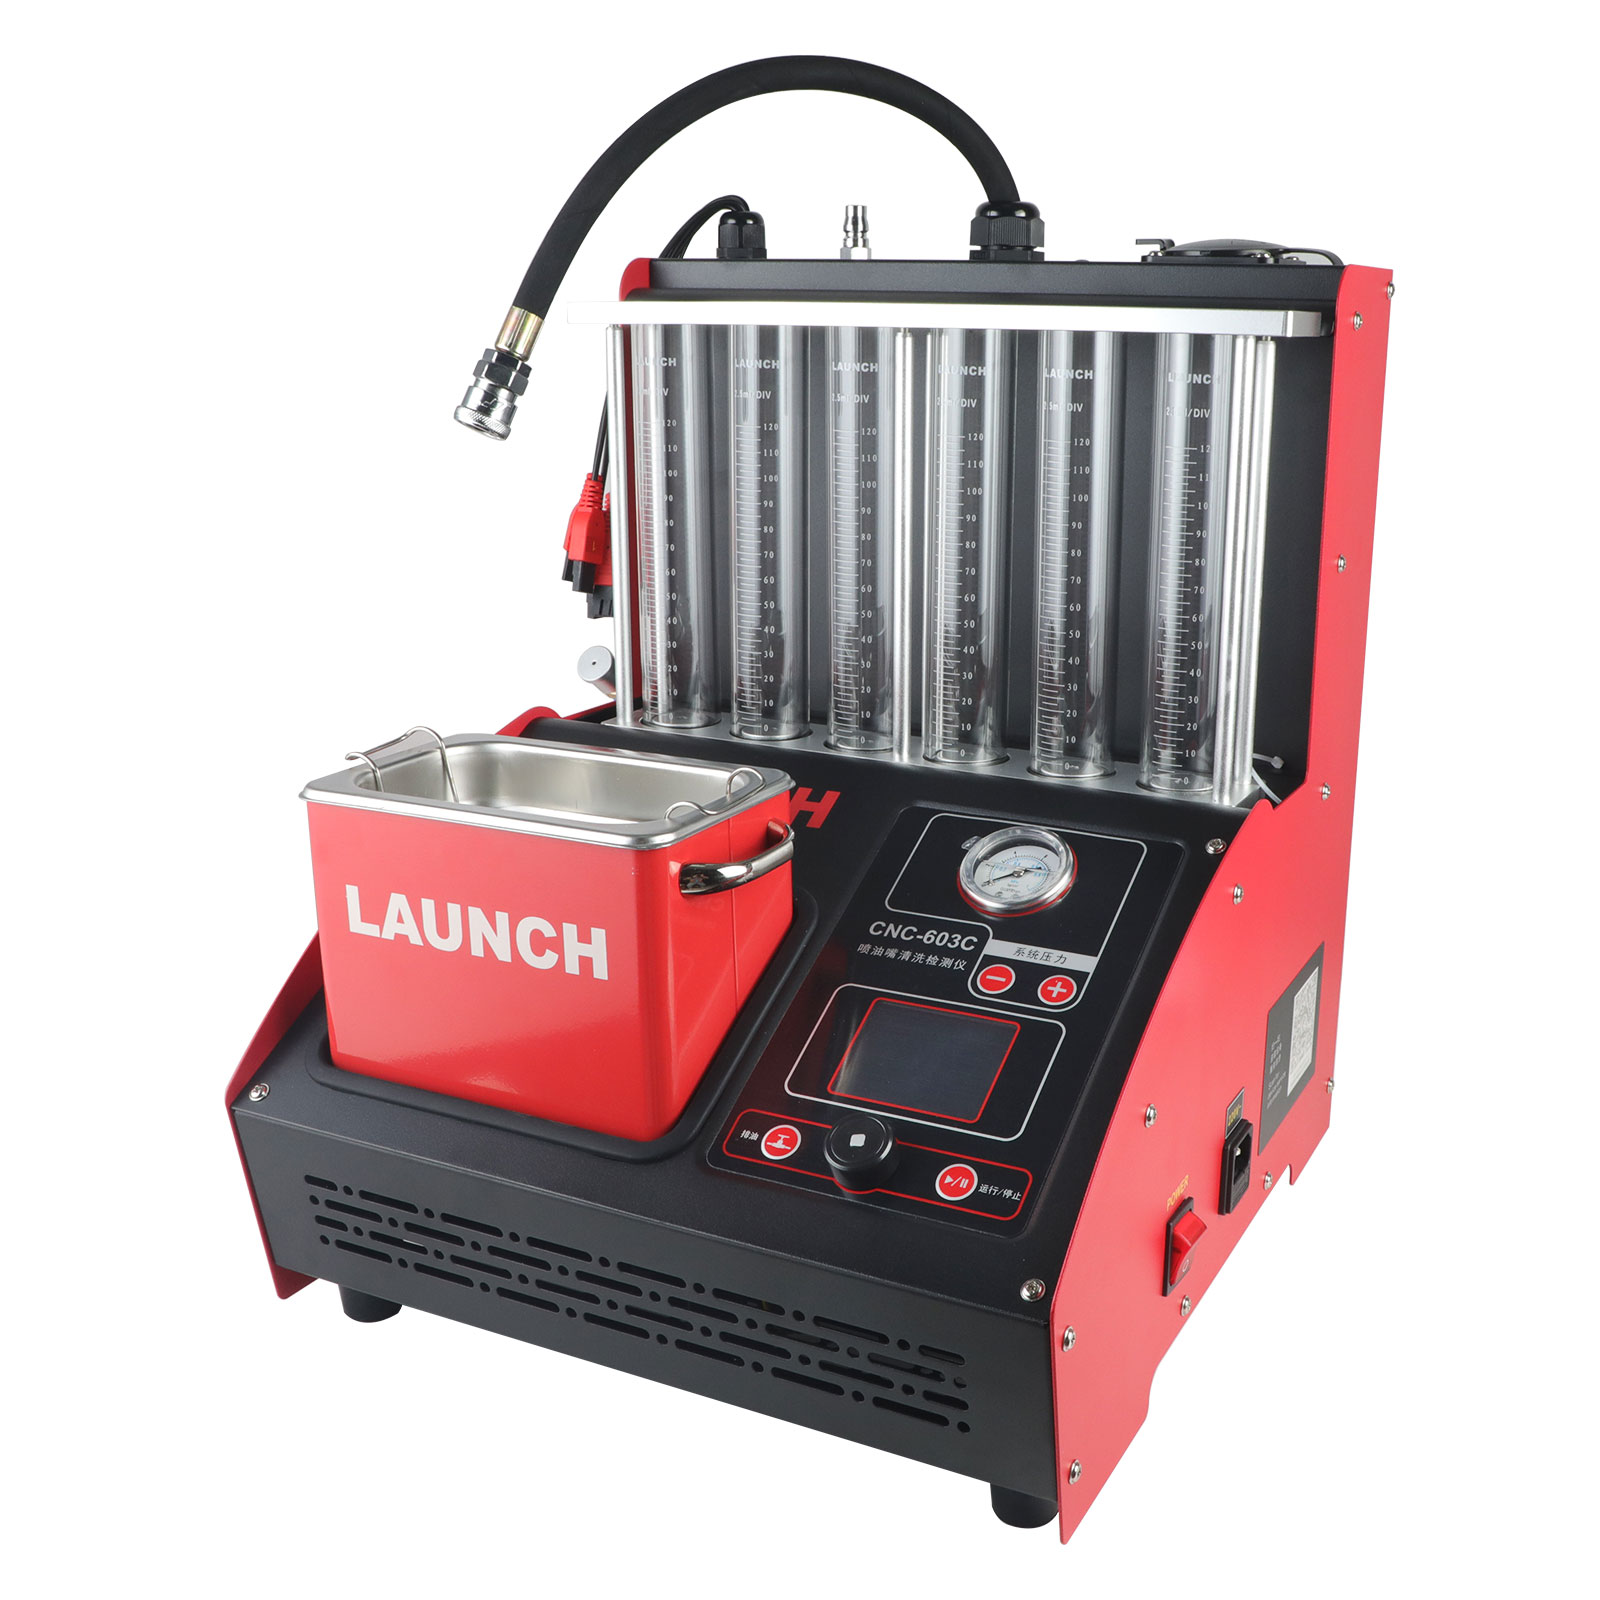
LAUNCH CNC 603C 220V 300W Injector Cleaner & Tester CNC 603C Fuel Injector Tester Cleaning Machine Test Bench Equipment tools for garage
Item No. IC033
In Stock.
History sold.
0 out of 50 global ratings
- 5 stars:0%
- 4 stars:0%
- 3 stars:0%
- 2 stars:0%
- 1 stars:0%
ratings| answered questions
0 out of 5
0 global ratings
- 5 stars:0%
- 4 stars:0%
- 3 stars:0%
- 2 stars:0%
- 1 stars:0%
Latest price:$599.00
Buy Now:
$
579.00
3% off
Fast Shipping & No Tax
US Check: Ship from US
UK Check: Ship from UK
EU Check: Ship from Czech
Looking for help? Please contact Whatsapp: +86-19892834301
- Shipping:
-
Free Shipping
Express Shipping ServiceEstimated delivery time: 3-5 Working Days
- Quantity:
- Stock:29
- Weight:
- 16 KG
- Package:
Related Download Files
Share
LAUNCH CNC 603C 220V 300W Injector Cleaner &
Tester CNC 603C Fuel Injector Tester Cleaning Machine Test Bench Equipment tools
for garage
1. Functions and
Features
Main
Functions
Uniformity / Sprayability
test: to detect the uniformity of the fuel injection
quantity of each injector and monitor the spray status of injectors thoroughly
and carefully by using the backlight, and to backflush
injectors.
Leakage test: to test the leakage
and dribbling conditions of injectors under system
pressure.
Injecting flow test: to detect the amount
of fuel injected normally by injectors in 15
seconds.
Auto test: under specific working
conditions and parameters, the precise simulation of test of injectors under
various working conditions
Ultrasonic cleaning: to perform ultrasonic
cleaning on multiple injectors at the same time, removing carbon deposits on
injectors completely.
On-Vehicle Cleaning: Coming with a variety
of disassembly-free cleaning connectors, the device can
be
used to perform on-vehicle cleaning and maintenance
for various vehicle models.
Language selection: the system supports
multiple languages and users can choose the appropriate language according to
their needs.
Version information: to check the software
version information of the current device.
Main Features
*Adopting ultrasonic
cleaning technology, CNC-603A Injector Cleaner & Tester presents a strong
cleaning ability;
*The product also
adopts fuel pressure adjustment and control technology by microcomputer, which
can ensure stable fuel pressure and wide adjustable range. It is applicable to
vehicles equipped with a variety of gasoline injection systems. Meanwhile, the
automation of injectors' cleaning and testing processes can be
realized.
*Thanks to the adoption
of microcomputer automatic control and digital display technologies, the
cleaning
and testing processes can be controlled automatically
and the parameters of the main status can be monitored in real
time.
*Automatic fuel drain
during a certain test can be realized via a routine, owing to the adoption of
automatic
fuel drain control technology. Start or [stop] fuel
drainage via the [Drain] button on the control panel in running or stop
state
1. Cleaning and Testing
Sequences
It is recommended to carry out the complete cleaning
and testing procedures in the following order.
*Ultrasonic
cleaning;
*Uniformity / Sprayability
test;
*Leakage test;
*Injecting flow
test;
*Auto. test.
Select the
corresponding parameter according to different test items and set it. See "V.
Operation Processes" for
details.
2. Cleanup after
Operation
After the end of cleaning and testing, a cleanup
should be done, which includes:
*Press [Drain] button
on the control panel to drain test solution to a fuel
container.
*Switch off the power switch and unplug the power
plug.
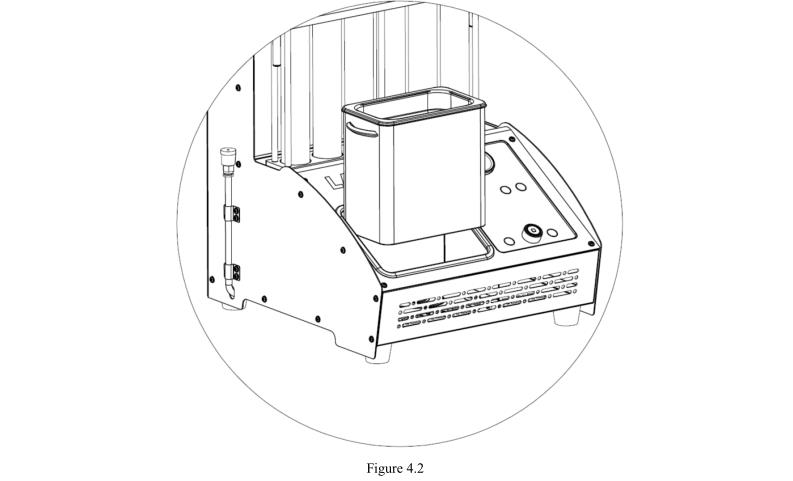
*Take out the ultrasonic cleaning pool and pouring
out all cleaning fluid completely shown in Figure 4.2, and wipe the
ultrasonic cleaning unit with a soft dry cloth.
*Wipe the table top of
the machine with a soft dry cloth.
*To avoid
volatilization, all the test solution in the fuel tank should be discharged. If
it can be used again, store it in a safe place. If it is dirty and cannot be used
any more, dispose it according to relevant regulations.
3. Specifications: Working
Environment:
Power: AC110V-127V,50Hz/60Hz 3Amax
AC220V-230V,50Hz/60Hz 1.5Amax
Mechanical Power:
300W
Ultrasonic Cleaning
Power: 100W
Speed Range for Simulation
Test: 10~9990rpm
(step: 10rpm)
Environment
Temperature: 0ºC~+45ºC
Relative Humidity:
<85%
Strength of External Magnetic
Field: <400A/m
Open fires is strictly prohibited within
2m.
Timing Range:
1~9999s
Pulse Width Range:
0.5~25ms (step: 0.1ms)
Operating Volume: 3000ml
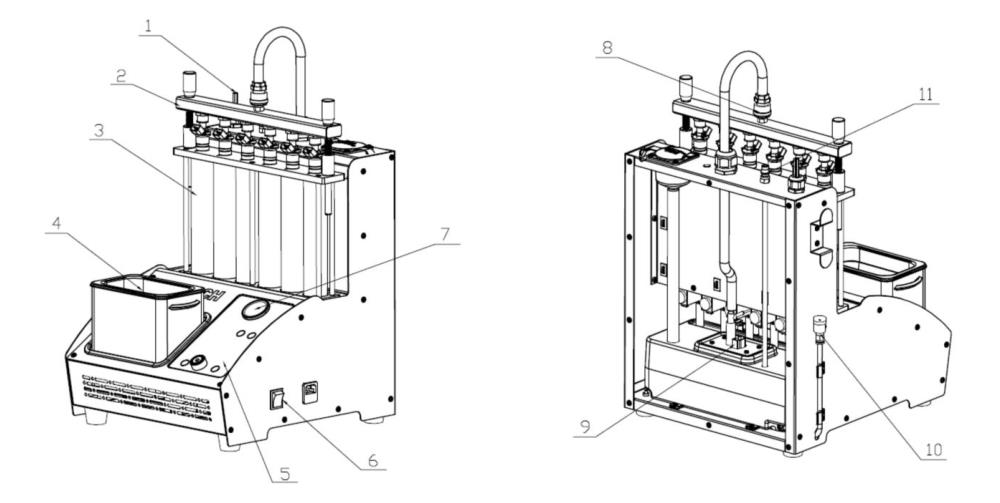
1- Pulse line; 2-Fuel
distributor assembly; 3-Observation window tube; 4-Ultrasonic
cleaner;
5-Control panel; 6-Power switch; 7-Fuel pressure gauge; 8-Quick
Connector ; 9-Fuel pump;
10-Fuel drainage pipe; 11-Automatic cleaning oil
return port
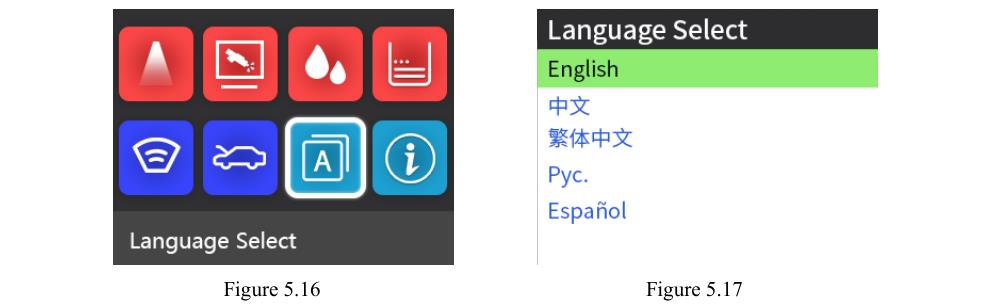
4. Language
Selection
To adapt to the needs of different countries, multiple
languages are available. Users can choose the appropriate
language according
to their needs.
Method and
Steps:
1) Move the cursor to the language selection icon on the
main interface and press the knob to enter the
language selection interface,
as shown in Figure 5.16.
2) Turn the knob to select the corresponding
language, as shown in Figure 5.17. Press the knob and the
system will
automatically change the language and exit the language selection interface
automatically.
There are English, Japanese, Russian, Korean, French,
Portuguese, Italian, Chinese to choose from.
Customer Questions & Answers
Customer Reviews
0 Stars of 5,0 Reviews.
- 5 stars:0%
- 4 stars:0%
- 3 stars:0%
- 2 stars:0%
- 1 stars:0%
Share your thoughts with other customers.
Write a reviewTop customer reviews
You may also like


-
AUTOOL CT150 Ultrasonic Auto FUEL Injector Cleaner Tester 220V/110V Upgrade Version of CT200
$289.006% off

-
ANCEL ANJ600 GDI Piezo EFI FSI 6-Cylinder Ultrasonic Wave Fuel Injector Tester Cleaner Machine Use for Car Motorcycle Cleaning
$479.004% off


- Payment:

-
Tel
+86-19892834301 -
WhatsApp
